 |
ALL SCI-FI
The place to “find your people.”
|
| View previous topic :: View next topic |
| Author |
Message |
trekriffic
Starship Navigator

Joined: 19 Feb 2015
Posts: 593
|
 Posted: Sun Jan 06, 2019 5:46 pm Post subject: USS Antares - from STTOS episode "Charlie X" Posted: Sun Jan 06, 2019 5:46 pm Post subject: USS Antares - from STTOS episode "Charlie X" |
 |
|
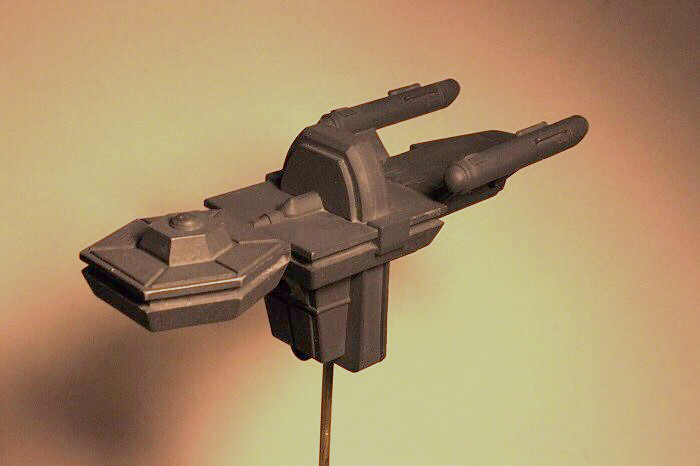
Got this kit off Federation Models sometime back. This is the SRS Prototyping urethane resin kit of the ill-fated USS Antares, the survey and supply ship shown in the remastered episode of "Charlie X":
Box Art :

Box Art by trekriffic, on Flickr
I've always liked this design and plan to place it into a diorama with the 1/1000 scale USS Enterprise at some point.
Anyway, after washing the parts in hot water and Comet to remove any vestiges of mold release I set about cleaning up any residual parting lines and filling any voids with putty. Overall, there was very little of either so my hat's off to the caster for doing an excellent job molding the parts. With just 6 parts to work with cleanup and sanding didn't take long at all:
Parts:

USS Antares Parts - Top by trekriffic, on Flickr
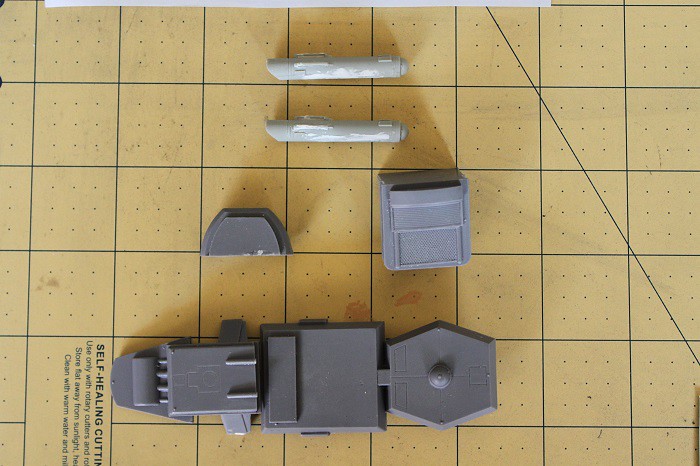
USS Antares Parts - Underside by trekriffic, on Flickr
The decals are your typical waterslide variety. Nice touch including decals for the window ports:
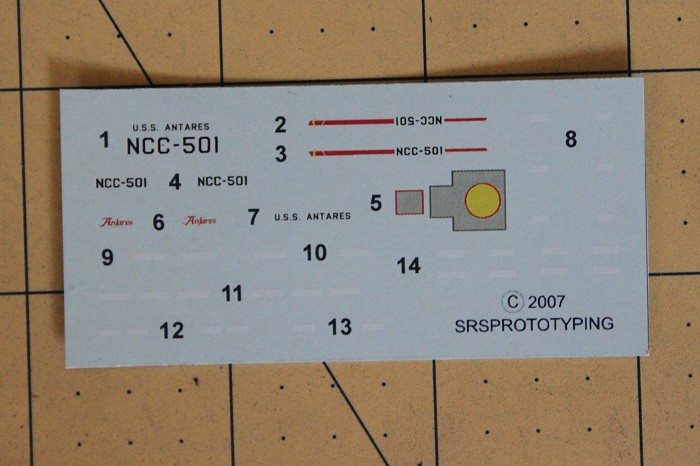
USS Antares Decals by trekriffic, on Flickr
The instruction sheet. Fairly straightforward with some general tips on working with resin kits:

USS Antares Instructions by trekriffic, on Flickr
Nice exploded diagram showing parts assembly, a paint guide, and where to place the various decals:

USS Antares Exploded Parts and Decal Guide by trekriffic, on Flickr
Nacelle after a little work sanding and puttying:

USS Antares Starboard Nacelle by trekriffic, on Flickr
End cap. This is the same one seen on the First Pilot version of the Enterprise:
USS Antares Nacelle End Cap by trekriffic, on Flickr
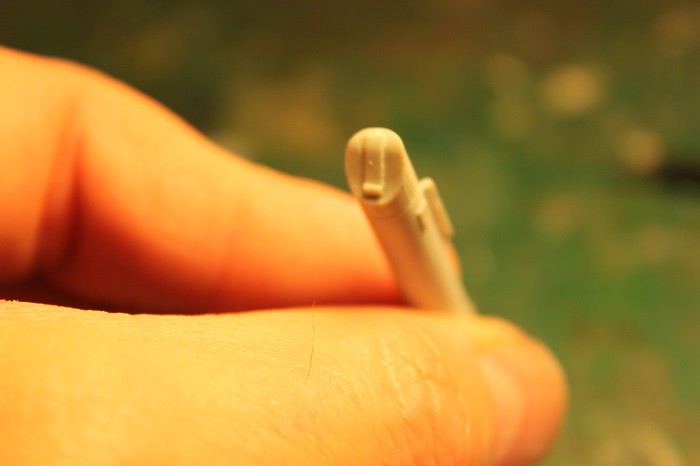
Nacelle dome. Sanding off the two parting lines without removing the three little hydrogen sensor nibs took some doing:
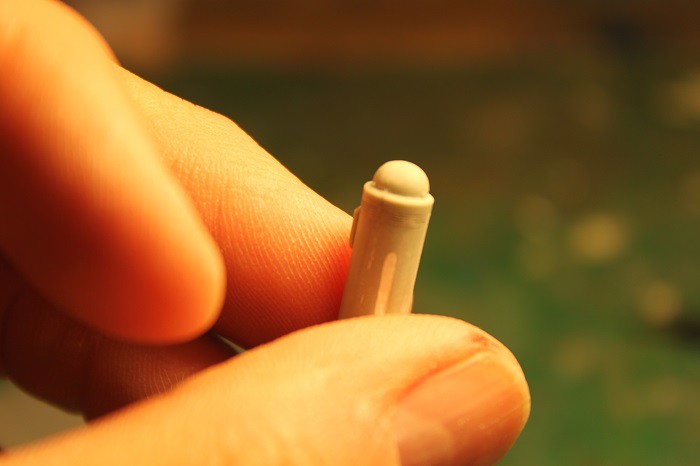
USS Antares Nacelle Dome by trekriffic, on Flickr |
|
| Back to top |
|
 |
trekriffic
Starship Navigator
Joined: 19 Feb 2015
Posts: 593
|
| Posted: Sun Jan 06, 2019 5:48 pm Post subject: |
|
|
Underside and top of the stern section. Very nice detailing with the engraved panel lines:

USS Antares Stern Section - Underside by trekriffic, on Flickr

USS Antares Stern Section - Top by trekriffic, on Flickr
Lower hull section front. The deflector dish has a small hole in the center. I will probably use a small piece of music wire to make a spike for gluing into the center of the dish:
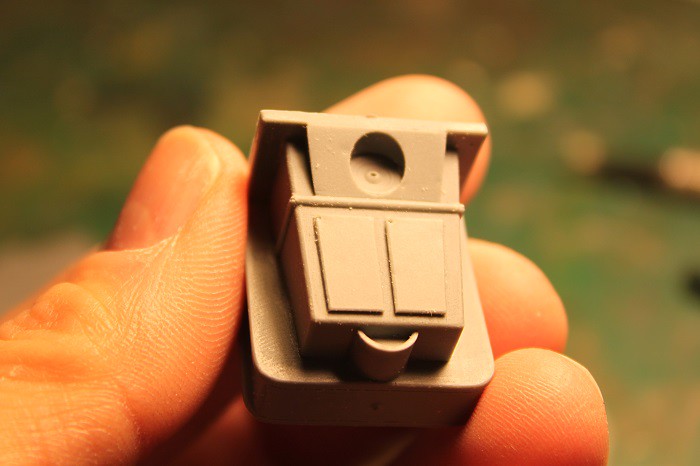
USS Antares Lower Hull Section - Front by trekriffic, on Flickr
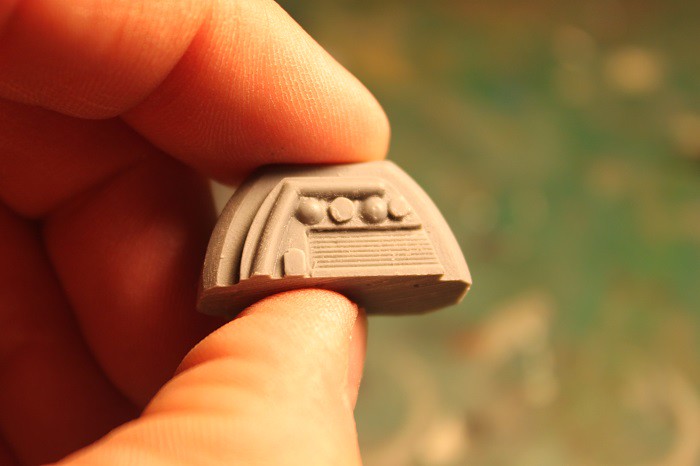
Backside of the lower hull:
USS Antares Lower Hull Section - Back by trekriffic, on Flickr
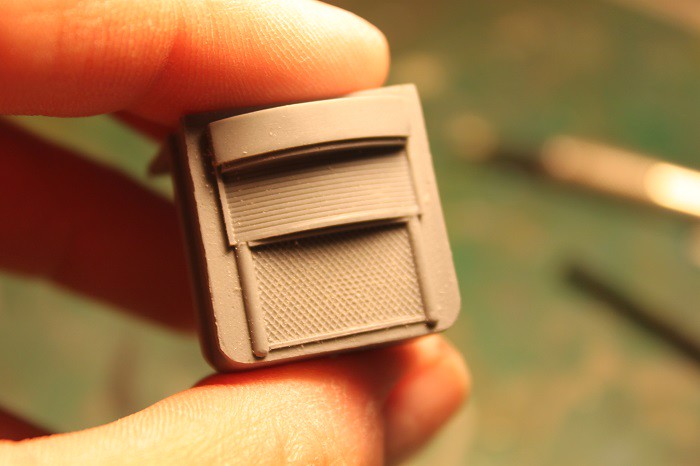
Upper hull section. Just a little cleanup needed:
USS Antares Upper Hull Section - Back by trekriffic, on Flickr
Nacelles. Groovy baby. Not sure why there were two slots in each for gluing to the support strut tab so I filled the extra slot with putty:
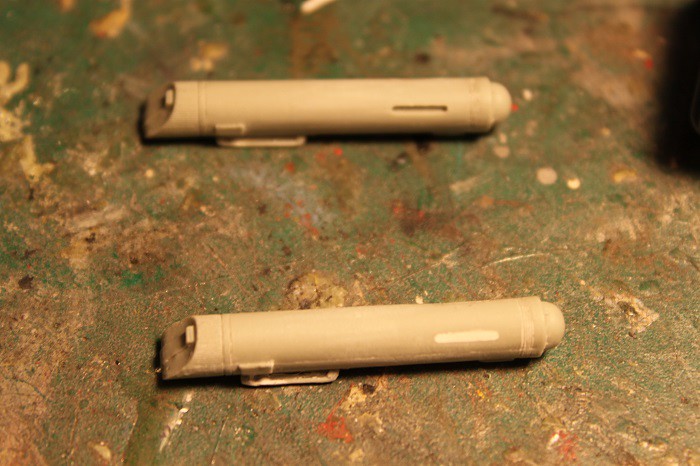
USS Antares Nacelles by trekriffic, on Flickr
Before assembling the hull, a hole was drilled into the lower hull using my drill press. A brass rod will be inserted for display purposes:
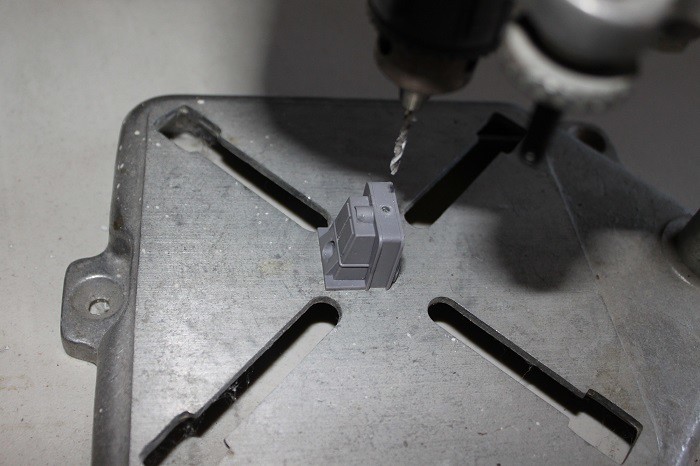
Drill Press by trekriffic, on Flickr
After drilling, the brass rod fit snugly into the hole:
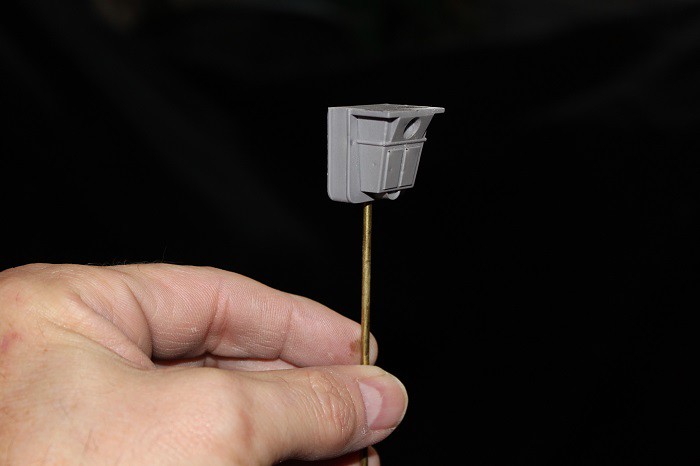
Test Fit with Brass Rod by trekriffic, on Flickr
Gluing of the sub-assemblies. I used Plastic Surgery CA glue, great stuff and holds like iron. The nacelles are delicate and will be glued on later after hull painting:
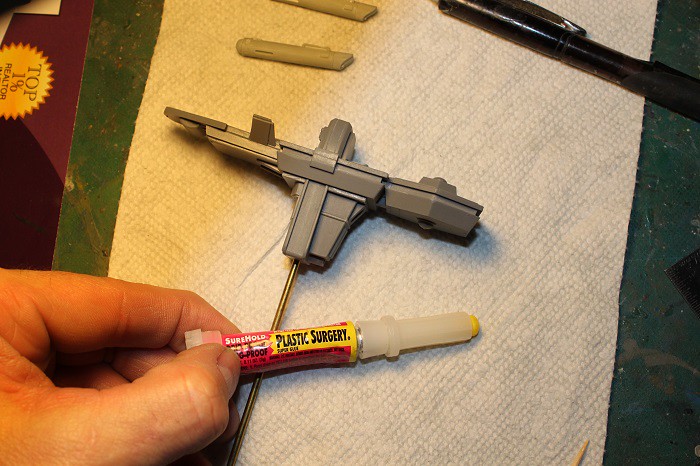
USS Antares - Gluing of Subassemblies by trekriffic, on Flickr
Here's a neat little thing I came up with awhile ago for keeping my putty fresh between puttying sessions. I drilled a hole thru the lid of a glass bottle I bought at my local Michaels craft store. The bottle contains tap water:
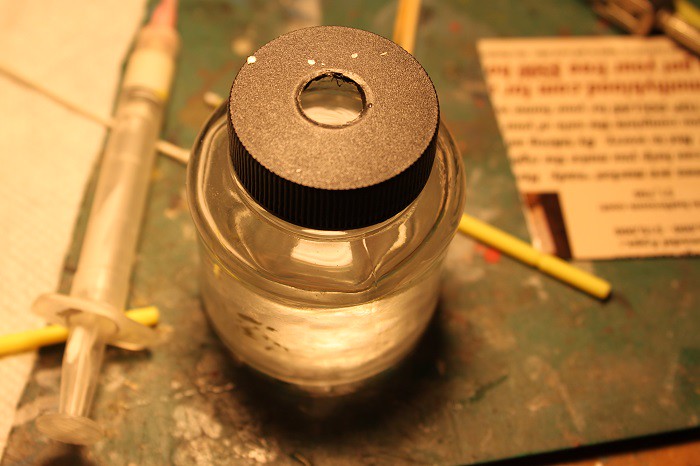
Bottle for Perfect Plastic Putty Syringe by trekriffic, on Flickr
Here's one of the syringes I bought years ago at TAP Plastics. It's meant for use injecting clear resins and fits thru the hole I drilled in the lid. I use it for applying Perfect Plastic Putty into seams. The putty is water-based and keeping the needle submerged in water will prevent the putty from drying out in the syringe. I have been using the same putty in this syringe for over 4 months now and it has not dried out and is always ready for use:
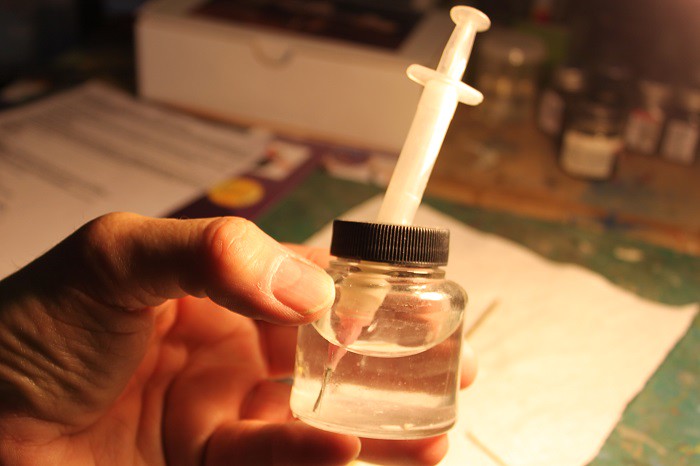
Syringe of Perfect Plastic Putty in Bottle by trekriffic, on Flickr
There were some narrow seams to fill which was easy using my syringe of PPP:
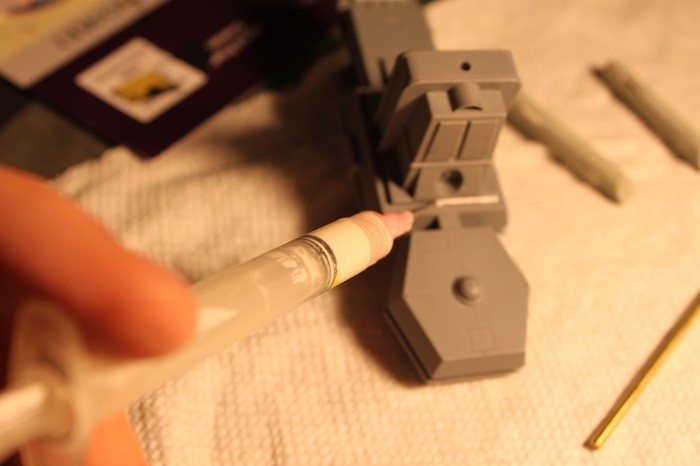
Putty Application by trekriffic, on Flickr
I used a pointed cotton swab and a micro brush dipped in water to remove excess putty along the seams. No sweat!
Putty Cleanup by trekriffic, on Flickr
This lacquer-based primer is less expensive by volume than Tamiya model primer and dries fast. It's easy to sand too:
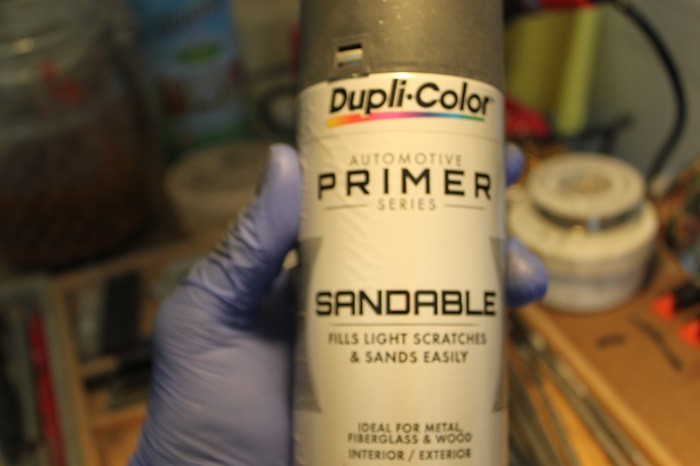
Duplicolor Primer by trekriffic, on Flickr
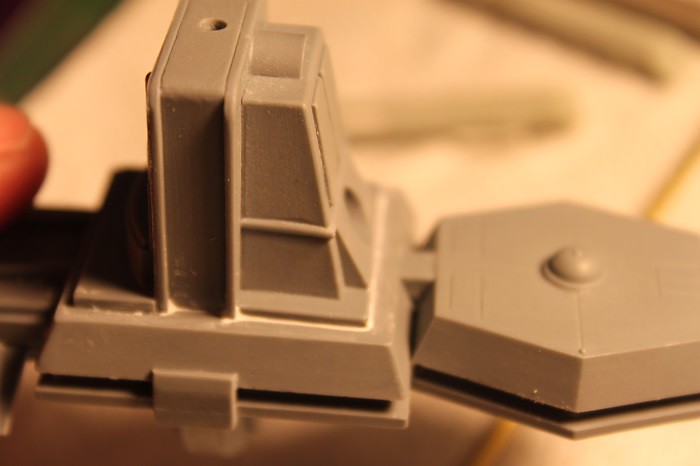
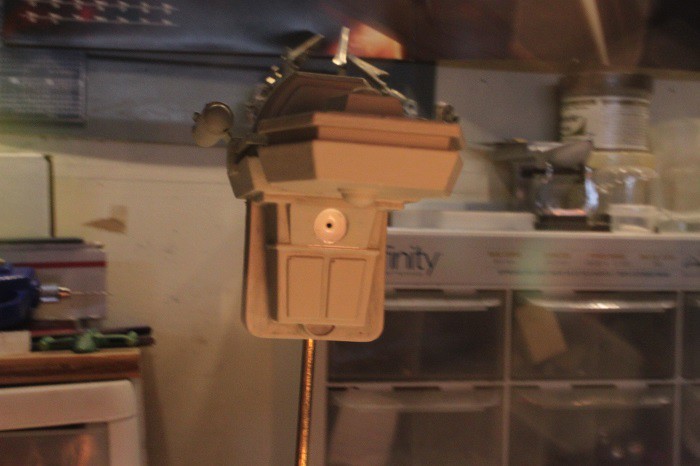
After a wipe down with 70% isopropyl alcohol to remove any oils from my hands I gave her a shot of automotive primer.
The nacelles will be primed, painted and attached later before decaling as they can easily be damaged while working on the rest of the model:
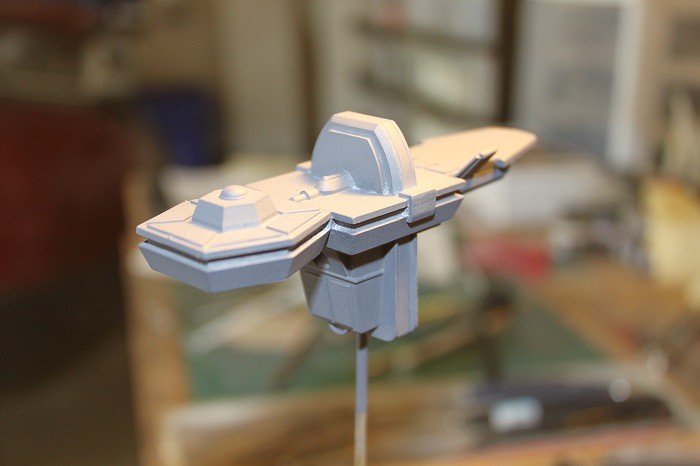
USS Antares - Primed by trekriffic, on Flickr
Here's a still from the episode to show kinda what I'm shooting for:

USS Antares - Remastered Screenshot by trekriffic, on Flickr
Thanks for reading. More to come assuming Charlie doesn't wish me away in a fit of pique. |
|
| Back to top |
|
|
trekriffic
Starship Navigator
Joined: 19 Feb 2015
Posts: 593
|
| Posted: Sun Jan 06, 2019 5:49 pm Post subject: |
|
|
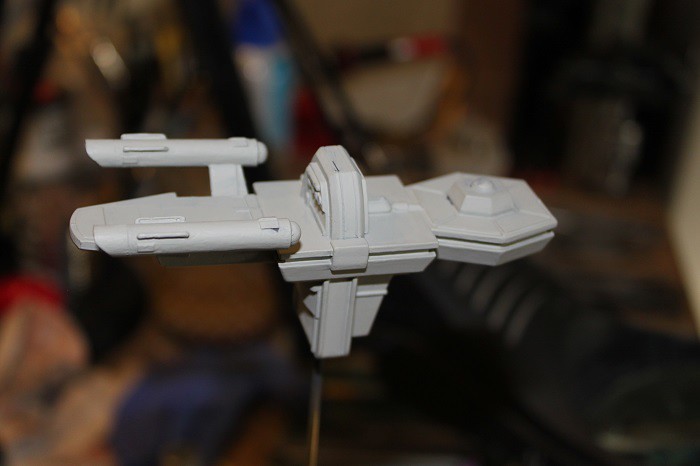
I went ahead and attached the nacelles with the Plastic Surgery glue. The struts were stouter than I initially thought and it will make it easier come painting and decaling time...

USS Antares - Nacelles Attached by trekriffic, on Flickr

USS Antares - Nacelles Attached by trekriffic, on Flickr

USS Antares - Nacelles Attached by trekriffic, on Flickr
Brushed with Tamiya Primer. Will lightly sand and spray with Duplicolor primer next:

USS Antares - Nacelles Brush Primed by trekriffic, on Flickr
Before spraying primer on the nacelles I masked the secondary hull so as not to fill all the fine panel lines with primer:
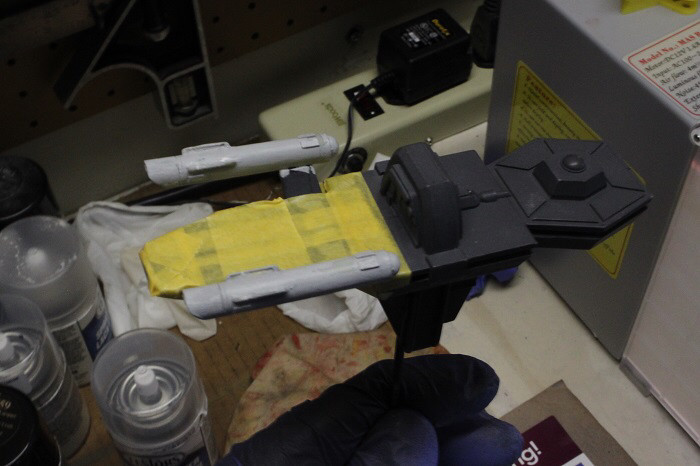
Masking Secondary Hull by trekriffic, on Flickr
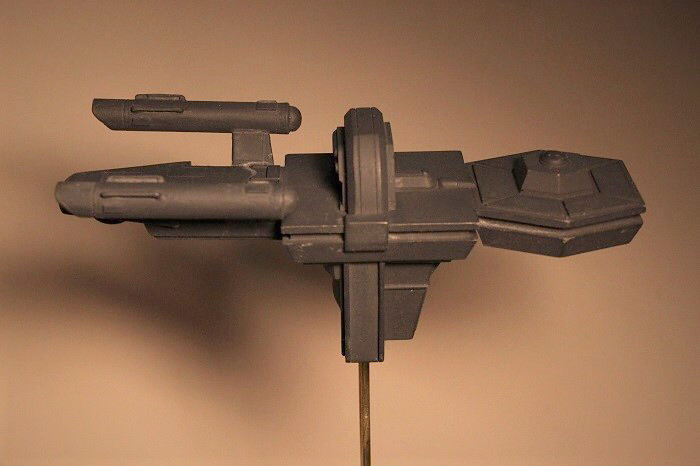
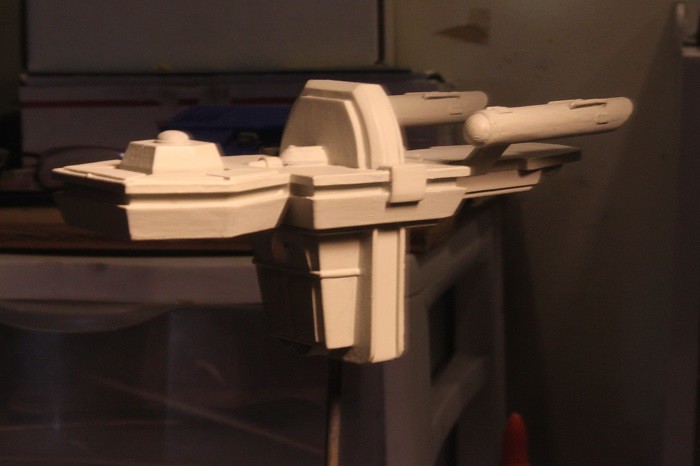
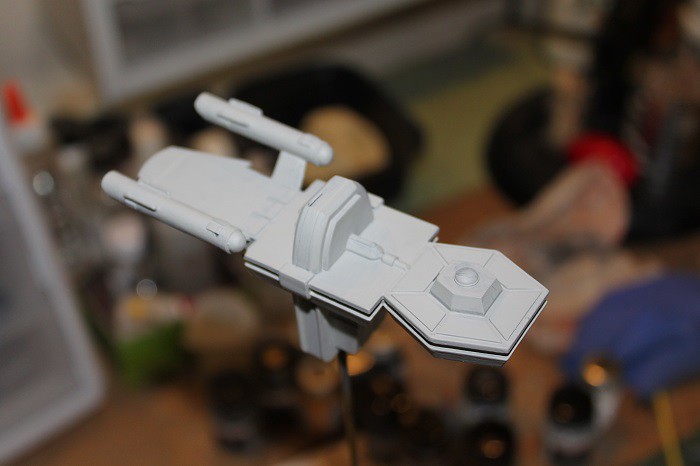
Here are some shots of the assembled freighter ready for light sanding and final hull colors...

USS Antares - Primed by trekriffic, on Flickr
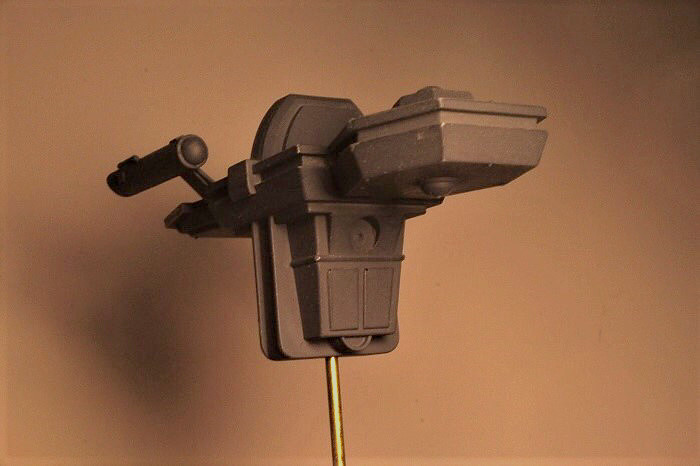
USS Antares - Primed by trekriffic, on Flickr
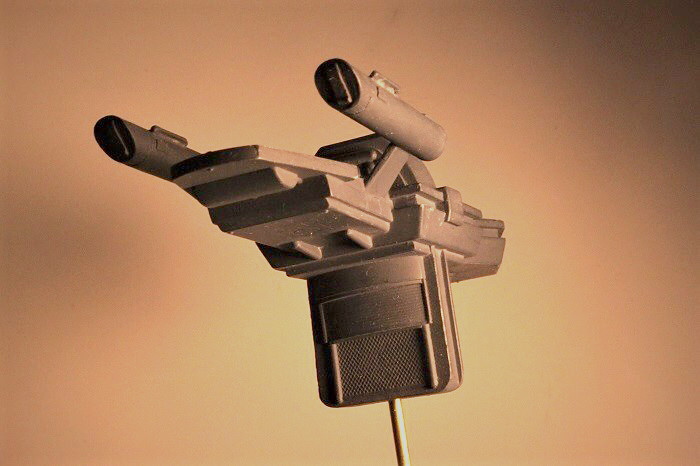
USS Antares - Primed by trekriffic, on Flickr
USS Antares - Primed by trekriffic, on Flickr
USS Antares - Primed by trekriffic, on Flickr
Shot of the Antares on my workbench:
Antares on the Bench by trekriffic, on Flickr |
|
| Back to top |
|
|
Gord Green
Galactic Ambassador

Joined: 06 Oct 2014
Posts: 3017
Location: Buffalo, NY
|
| Posted: Mon Jan 07, 2019 12:30 am Post subject: |
|
|
A truly lovely little piece!
What fantastic detail!
Love it!
_________________
There comes a time, thief, when gold loses its lustre, and the gems cease to sparkle, and the throne room becomes a prison; and all that is left is a father's love for his child. |
|
| Back to top |
|
|
Bud Brewster
Galactic Fleet Admiral (site admin)

Joined: 14 Dec 2013
Posts: 17637
Location: North Carolina
|
| Posted: Mon Jan 07, 2019 11:31 am Post subject: |
|
|
________________________________
Wonderful post, Steve! 
I know I'm not the only one who appreciates the time you took to describe each step in the process and the materials you used. I really enjoyed reading about the work you've done and the decisions you made to get the best results.
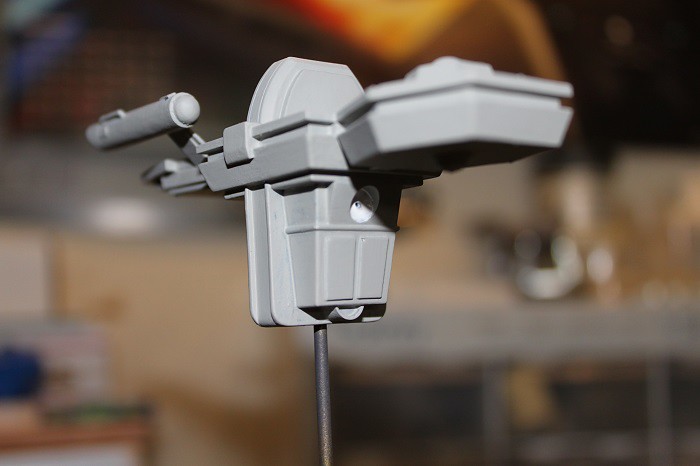
By the way, what is that structure below the shi, at the low end of the support rod?
I'm looking forward to the next installment.
_________________
____________
Is there no man on Earth who has the wisdom and innocence of a child?
~ The Space Children (1958) |
|
| Back to top |
|
|
trekriffic
Starship Navigator
Joined: 19 Feb 2015
Posts: 593
|
| Posted: Mon Jan 07, 2019 1:03 pm Post subject: |
|
|
| Bud Brewster wrote: | Wonderful post, Steve!
By the way, what is that structure below the ship, at the low end of the support rod? |
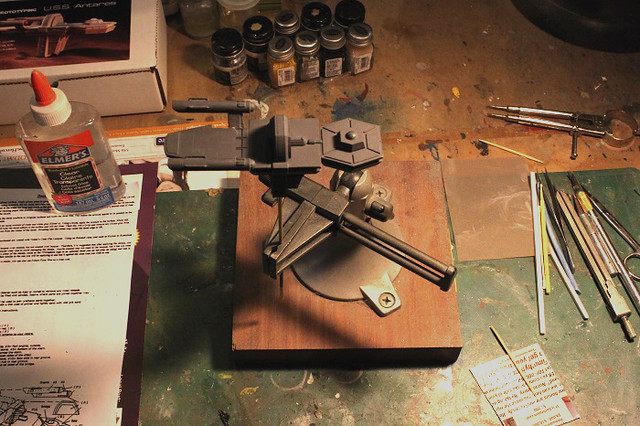
You mean my portable vise?
____________ |
|
| Back to top |
|
|
Bud Brewster
Galactic Fleet Admiral (site admin)
Joined: 14 Dec 2013
Posts: 17637
Location: North Carolina
|
| Posted: Mon Jan 07, 2019 2:19 pm Post subject: |
|
|
________________________________
Oh! It's the same color as the model, so I thought it was part of the stand and it was some other Star Trek object (like a supply depot) that the ship would be flying over. 
_________________
____________
Is there no man on Earth who has the wisdom and innocence of a child?
~ The Space Children (1958) |
|
| Back to top |
|
|
trekriffic
Starship Navigator
Joined: 19 Feb 2015
Posts: 593
|
| Posted: Mon Jan 07, 2019 2:45 pm Post subject: |
|
|
| Bud Brewster wrote: | | Oh! It's the same color as the model, so I thought it was part of the stand and it was some other Star Trek object (like a supply depot) that the ship would be flying over. |
You have such an active imagination! |
|
| Back to top |
|
|
trekriffic
Starship Navigator
Joined: 19 Feb 2015
Posts: 593
|
| Posted: Tue Jan 08, 2019 6:37 pm Post subject: |
|
|
Another longer bench shot. I tried overspraying a too fresh layer of Duplicolor lacquer so the enamel orange peeled on me.
Yikes! I quickly wiped off the offending Japanese Navy Imperial Grey enamel.
That's the color the 1/350 Enterprise kit instructions said to paint the hull of the big Polar Lights Enterprise.
Anyway, I then did some light spit sanding before re-priming.
So this image is basically a filler until I finish the hull basecoats; although, you do get to see my immaculate workbench! 

Longshot Workbench by trekriffic, on Flickr |
|
| Back to top |
|
|
Bud Brewster
Galactic Fleet Admiral (site admin)
Joined: 14 Dec 2013
Posts: 17637
Location: North Carolina
|
| Posted: Tue Jan 08, 2019 8:18 pm Post subject: |
|
|
________________________________
Déjà vu!
My father was an avid (and skilled) worker with wood in the basement of our house, and to me his workshop was a place of magic. I used his tools and his equipment to do things like create simple sailboats for the lake near our house, or to modify the handle of the German bayonet I acquired to turn it into a Greek short sword so I could play Jason and Argonauts with two of my friends — who also had these bayonets!
I found pictures on line of these bayonets and modified one of them to show what I did in Dad's workshop.
Here's what I started with.

_________ 
Using Dad's grinding wheel and sandpaper (along with Brasso to polish it), here's what I ended up with.
_________ 
The last picture was modified with Paint.net, but it's a perfect replica of what I created.
And this is a picture I found on line which is pretty much what Dad's workbench looked like.
_________ 
I included this picture in my elaborate and highly personal thread for The Time Machine when I compared Rod Taylor's character to my father's skilled efforts to repair and maintain everything from lawn mowers to washing machines, along with creating woodcraft that I still have in my home today, all of which reminds me of my father's skill.
My father never built a time machine, but he taught me that creating things with one's mind and hands was the greatest joy of all.
His son went on to apply this to the novels I wrote and the artwork I've created — the latter of which includes this portrait of him.
Click on the image below to see a larger version you can zoom in on and study the ten-zillion little brush strokes I had to make to create this labor of love. 
_________ 
_________________
____________
Is there no man on Earth who has the wisdom and innocence of a child?
~ The Space Children (1958)
Last edited by Bud Brewster on Wed Jan 09, 2019 11:38 am; edited 1 time in total |
|
| Back to top |
|
|
trekriffic
Starship Navigator
Joined: 19 Feb 2015
Posts: 593
|
| Posted: Wed Jan 09, 2019 1:30 am Post subject: |
|
|
Those bayonets made great replicas of the movie props.
Love your dad’s workshop.
Your painting of your father... beautiful... |
|
| Back to top |
|
|
trekriffic
Starship Navigator
Joined: 19 Feb 2015
Posts: 593
|
| Posted: Sun Jan 13, 2019 6:24 pm Post subject: |
|
|
So did some work on the deflector dish.
After combing thru my greeblie stashes I came up empty so resolved to make the dish from scratch using .040 styrene sheet and music wire...
The punch, the pinvise, and the router bit used to make the deflector dish shown.
I also used a sanding stick:
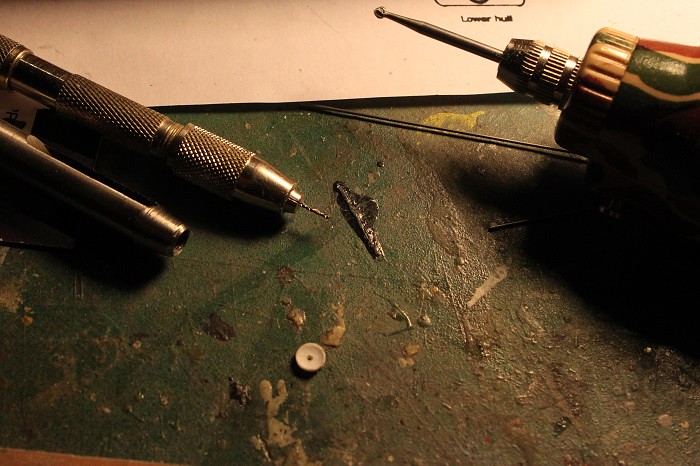
USS Antares - Deflector Dish Tools by trekriffic, on Flickr
After hollowing out the lightly punched disc I punched it out from some .040 thick sheet using a punch tool and a hammer.
Before that I drilled the center hole using a pinvise:
USS Antares - Concave Dish by trekriffic, on Flickr
After punching and hollowing out some .040 styreene using a round router bit in my handheld battery powered "dremel" tool, I glued the blank to a short piece of music wire using Plastic Surgery CA glue:
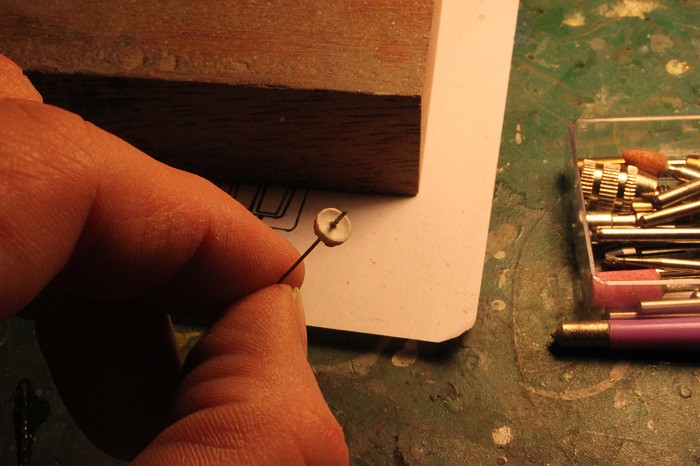
USS Antares - Styrene Disc Glued by trekriffic, on Flickr
The backside was shaped with a diamond file and sanding stick to get the right curvature:
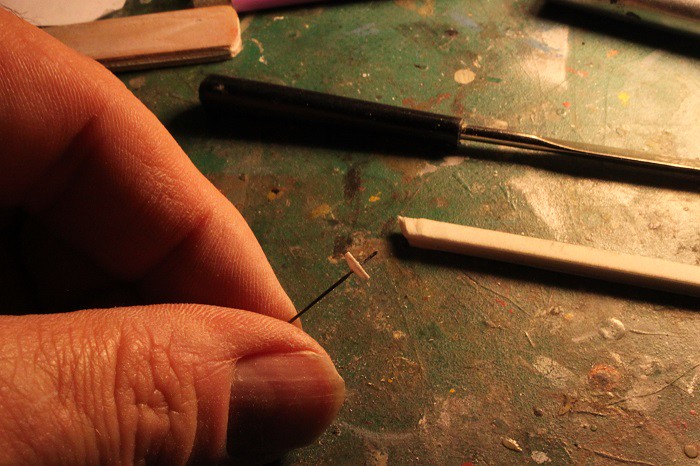
USS Antares - Deflector Dish Shaped by trekriffic, on Flickr
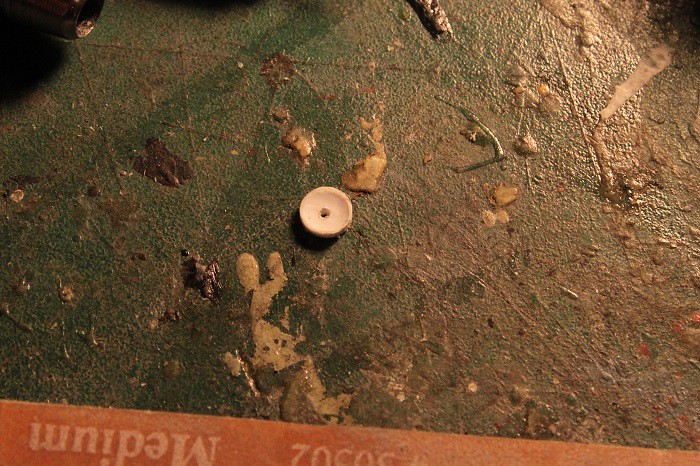
Deflector dish recess on lower hull.
White will be over painted with transparent blue acrylic:
USS Antares - Deflector Dish Work by trekriffic, on Flickr
Need to lightly sand with 400 grit or lighter:
USS Antares - All Brushed Gull Grey by trekriffic, on Flickr
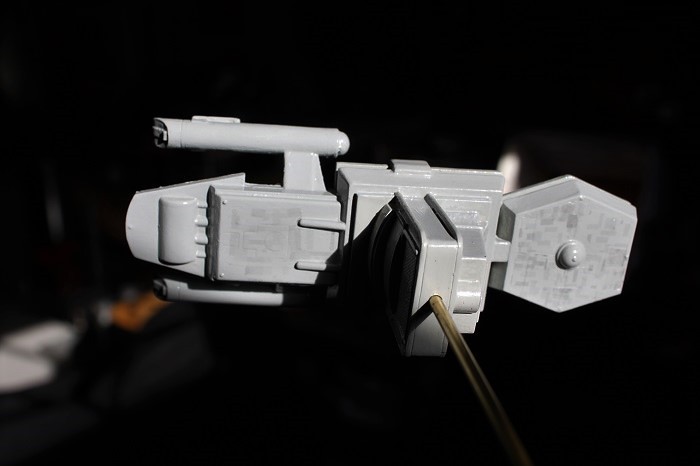
I've found some leftover decal material with panels from what I think was an Absolute Models set of aztec decals for the 1/2500 scale Enterprise D kit so plenty of small light grey panels to mix and match.
They should work well over the flat gull grey hull.
Of course being decals I'll need to gloss coat the hull first:
USS Antares - All Brushed Gull Grey by trekriffic, on Flickr
USS Antares - All Brushed Gull Grey by trekriffic, on Flickr
USS Antares - Gull Grey - Deflector Dish White Underpaint by trekriffic, on Flickr |
|
| Back to top |
|
|
Gord Green
Galactic Ambassador
Joined: 06 Oct 2014
Posts: 3017
Location: Buffalo, NY
|
| Posted: Mon Jan 14, 2019 3:13 am Post subject: |
|
|
Amazing work on such a small piece! Truly a work of art!
And Bud....I had that same bayonet in the late 50's! It must have been in every Army-Navy Surplus store in the country!
_________________
There comes a time, thief, when gold loses its lustre, and the gems cease to sparkle, and the throne room becomes a prison; and all that is left is a father's love for his child. |
|
| Back to top |
|
|
Bud Brewster
Galactic Fleet Admiral (site admin)
Joined: 14 Dec 2013
Posts: 17637
Location: North Carolina
|
| Posted: Mon Jan 14, 2019 9:51 am Post subject: |
|
|
________________________________
Astounding work, Steve. You should be working for NASA!
_________________
____________
Is there no man on Earth who has the wisdom and innocence of a child?
~ The Space Children (1958) |
|
| Back to top |
|
|
trekriffic
Starship Navigator
Joined: 19 Feb 2015
Posts: 593
|
| Posted: Fri Feb 08, 2019 2:25 pm Post subject: |
|
|
Thought it was about time I added some new pics of my progress. I've probably spent a good 2-3 hours already cutting out bits of leftover aztec decals to add interesting detail to the hull.
Still need to do the top of the forward crew module, the upper and lower hull superstructures, the nacelles, and the sides so probably another few hour or so.
Once the decals are in place I apply MicroSet then let them dry for 15-20 minutes before brushing with Liquid Decal Film to seal them.
When I'm done aztecing I'll seal with a coat of future before adding the kit window, stripe and registry decals...

USS Antares - Aztecing by trekriffic, on Flickr
USS Antares - Aztecing by trekriffic, on Flickr
I also need to paint the accent colors (slightly darker shades of grey) and the bussard domes. |
|
| Back to top |
|
|
|
|
You cannot post new topics in this forum
You cannot reply to topics in this forum
You cannot edit your posts in this forum
You cannot delete your posts in this forum
You cannot vote in polls in this forum
|
Powered by phpBB © 2001, 2005 phpBB Group
|


