 |
ALL SCI-FI
The place to “find your people.”
|
| View previous topic :: View next topic |
| Author |
Message |
trekriffic
Starship Navigator

Joined: 19 Feb 2015
Posts: 593
|
 Posted: Sat Mar 28, 2020 12:07 pm Post subject: USS Enterprise NCC-1701-E from Nemesis Posted: Sat Mar 28, 2020 12:07 pm Post subject: USS Enterprise NCC-1701-E from Nemesis |
 |
|
So while on vacation this past week I finally decided it was time to build the E.
I've had this model kit for a few decades I think.
Bought it at a Walgreens when they still carried plastic models; that, in itself, tells you how old this kit is.

Anyway, this is the 1/1400 scale Star Trek Insurrection kit but I will be building it as the Nemesis version...
Box Art:
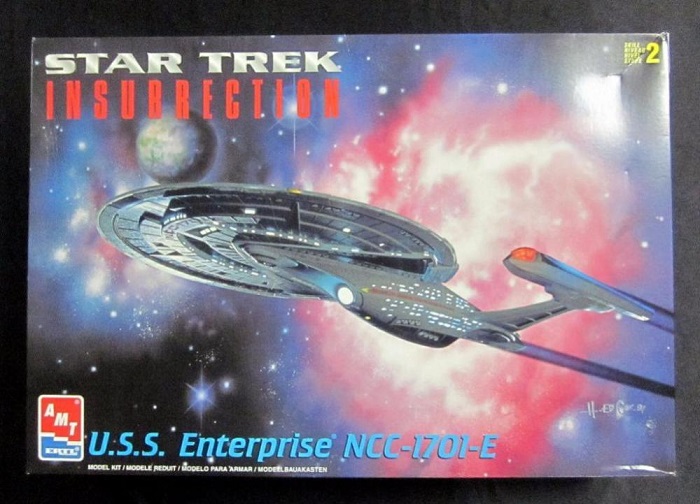
USS Enterprise E - AMT/Ertl Kit by Steve J, on Flickr
Kit Decals. Ship registry, pennants, lifeboats, etc:

USS Enterprise E - Nemesis-WIP-Kit Decals by Steve J, on Flickr
I also bought two aftermarket sets of decals some years ago from STModeler and Acreation Models.
First I bought STModeler's then saw Acreation had come out with a set of aztec decals so I bought them too.
First up STModeler:

USS Enterprise E - Nemesis-WIP-Decals STModeler by Steve J, on Flickr

USS Enterprise E - Nemesis-WIP-Decals STModeler by Steve J, on Flickr

USS Enterprise E - Nemesis-WIP-Decals STModeler by Steve J, on Flickr

USS Enterprise E - Nemesis-WIP-Decal Placement Guide by Steve J, on Flickr
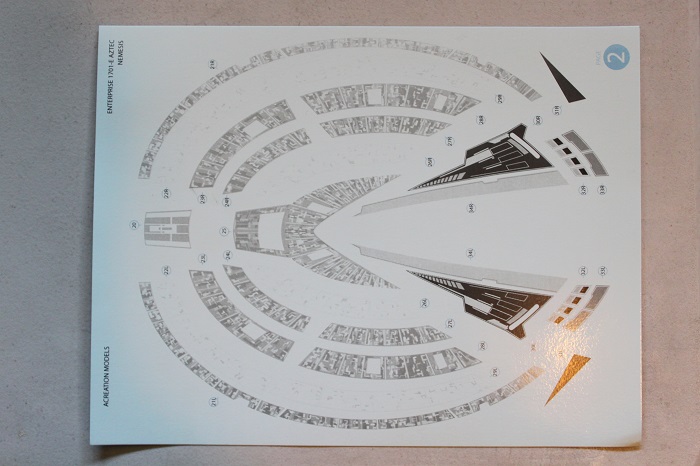
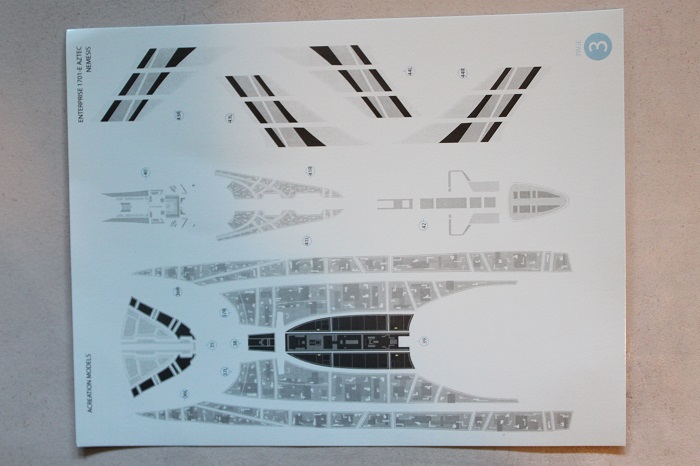
Then we have Acreation...
Instruction guide:

USS Enterprise E - Nemesis-WIP-Decals Acreation by Steve J, on Flickr
Decals for the warp nacelles, impulse engine vents, and deflector dish. And, of course, lots of escape pods:

USS Enterprise E - Nemesis-WIP-Decals Acreation by Steve J, on Flickr
Closeup of deflector dish decal:

USS Enterprise E - Nemesis-WIP-Decals Acreation by Steve J, on Flickr
Closeup of impulse engine vents:

USS Enterprise E - Nemesis-WIP-Decals Acreation by Steve J, on Flickr
You get 4 pages of aztecs:

USS Enterprise E - Nemesis-WIP-Acreation Aztec Decals by Steve J, on Flickr
Upper saucer:

USS Enterprise E - Nemesis-WIP-Acreation Decals Page 1 by Steve J, on Flickr
Lower Saucer:
USS Enterprise E - Nemesis-WIP-Acreation Decals Page 2 by Steve J, on Flickr
Secondary hull and struts:
USS Enterprise E - Nemesis-WIP-Acreation Decals Page 3 by Steve J, on Flickr
Warp nacelles:

USS Enterprise E - Nemesis-WIP-Acreation Decals Page 4 by Steve J, on Flickr
Decal placement guide:
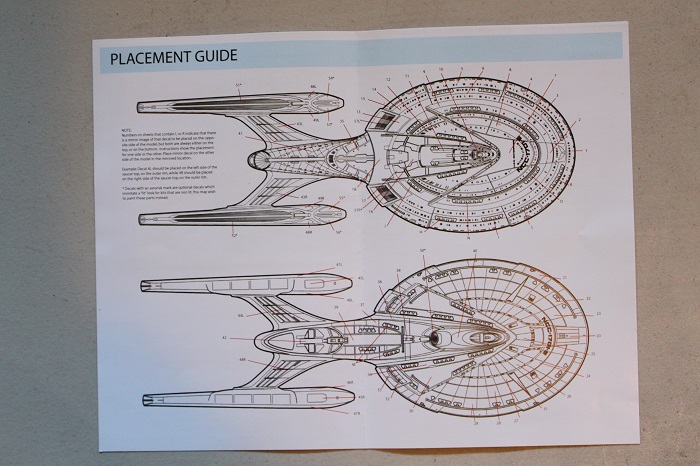
USS Enterprise E - Nemesis-WIP-Acreation Decals Placement Guide by Steve J, on Flickr
Not shown is the Paragrafix brass photo-etch I bought mainly for the deflector dish etch but we'll get around to that later on...
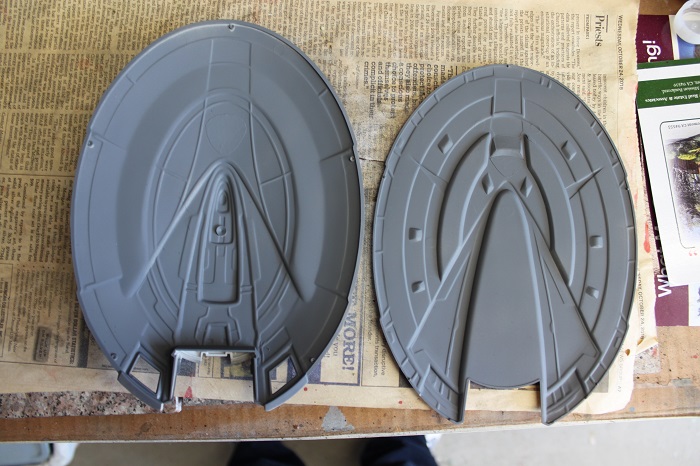
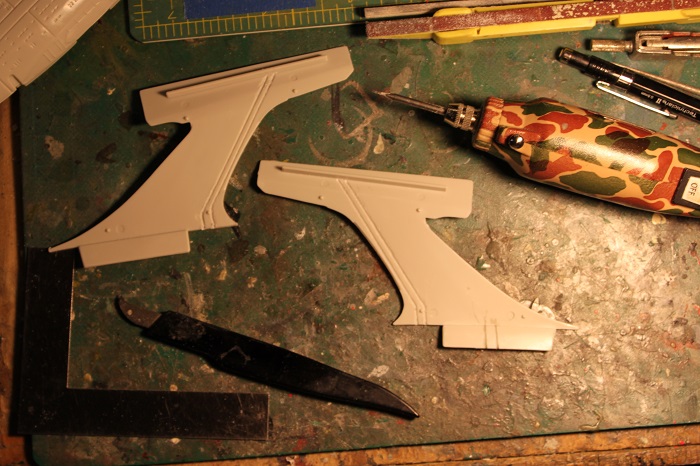
So... now to get started on plastic. First I took the parts out of the box. All there and accounted for:

USS Enterprise E - Nemesis-WIP-Saucer Sections by Steve J, on Flickr
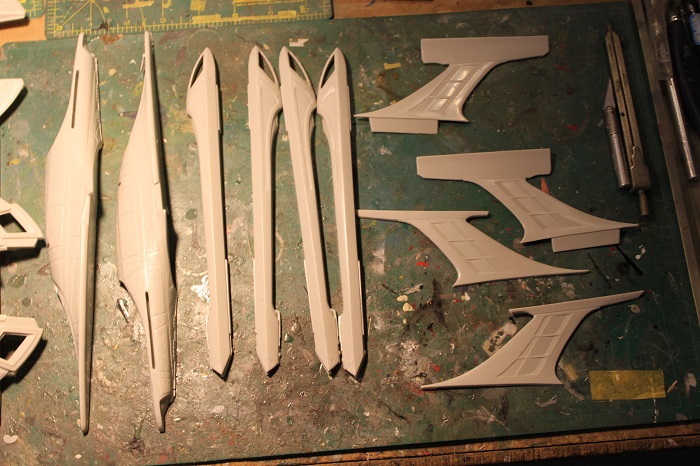
USS Enterprise E - Nemesis-WIP-More Parts by Steve J, on Flickr
Just a wee bit of flash:

USS Enterprise E - Nemesis-WIP-Flash by Steve J, on Flickr
Like I did with my USS Saratoga, this ship will get the Raytheon Effect treatment...
Using a soft lead pencil I trace the shape of the upper saucer floodlight on the upper saucer exterior hull.
I'll cut a section of masking tape to the same shape and apply to the inside of the hull for the Raytheon Effect:
USS Enterprise E - Nemesis-WIP-Floodlight in Pencil by Steve J, on Flickr
I used this CGI image off Modelermagic.com to get the shape of the upper saucer spotlight right:

USS Enterprise E - Nemesis-WIP-CGI by Steve J, on Flickr
Did the same for the lower saucer:
USS Enterprise E - Nemesis-WIP-Lower Floodlight in Pencil by Steve J, on Flickr
CGI image:

IMG_5825 by Steve J, on Flickr
Next I applied Tamiya tape for the lower saucer floodlight. This is on the inside of the model:

USS Enterprise E - Nemesis-WIP-Raytheon Effect Masking by Steve J, on Flickr
Same for the upper saucer floodlight.
Again, this is on the inside of the model:

USS Enterprise E - Nemesis-WIP-Raytheon Effect Masking by Steve J, on Flickr
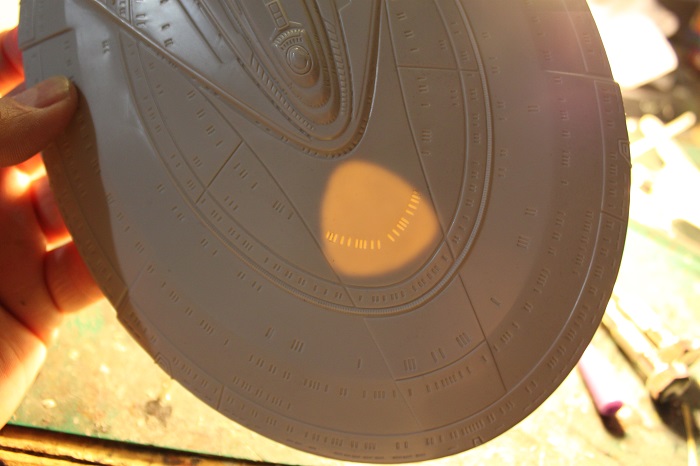
Holding the upper saucer hull up to the light so it shines thru the plastic allows me to check the position of the masking tape on the inside:

USS Enterprise E - Nemesis-WIP-Light Test by Steve J, on Flickr
Same for the lower saucer hull:
USS Enterprise E - Nemesis-WIP-Light Test by Steve J, on Flickr
With RE masking done I primed the inner saucer halves with Duplicolor grey automotive primer:
USS Enterprise E - Nemesis-WIP-Interior Priming by Steve J, on Flickr
Once dry I'll spray with black before a coat of white for even light reflectance.
So that's all for the moment.
Next time I'll show how I fixed the inaccuracies of
the deflector trench using my handy battery powered
hobby dremel, some styrene sheet and square rod, and AVES Apoxy sculpt.
Hope everyone out there is safe and sound during this scary time.
Thankfully, model building is a relatively solitary hobby so I'm able to cope with isolation better than most. |
|
| Back to top |
|
 |
Bud Brewster
Galactic Fleet Admiral (site admin)

Joined: 14 Dec 2013
Posts: 17637
Location: North Carolina
|
| Posted: Sat Mar 28, 2020 12:54 pm Post subject: |
|
|
________________________________
Hot dog, we're all looking forward to the "progress report" posts we'll get during your project — not to mention the spectacular pictures you'll post when the model is complete!
_________________
____________
Is there no man on Earth who has the wisdom and innocence of a child?
~ The Space Children (1958) |
|
| Back to top |
|
|
Gord Green
Galactic Ambassador

Joined: 06 Oct 2014
Posts: 3010
Location: Buffalo, NY
|
| Posted: Sat Mar 28, 2020 4:15 pm Post subject: |
|
|
Great looking model!
I always have trouble getting those pesky decals right!
Good luck...or do you have a technique to do them?
_________________
There comes a time, thief, when gold loses its lustre, and the gems cease to sparkle, and the throne room becomes a prison; and all that is left is a father's love for his child. |
|
| Back to top |
|
|
trekriffic
Starship Navigator
Joined: 19 Feb 2015
Posts: 593
|
| Posted: Sat Mar 28, 2020 6:48 pm Post subject: |
|
|
| Gord Green wrote: | Great looking model!
I always have trouble getting those pesky decals right!
Good luck...or do you have a technique to do them? |
Do them in small sections. Soak for 20 seconds using warm water with a tiny squirt of dishwashing soap mixed in. Wet the model and position the decal adjacent to where you want it and slide it off using a toothpick or cotton swab. Position it then tamp it down carefully with a makeup sponge to push the water out from under the decal. Brush on some MicroSOL to get it to shrink down tighter. After 15 minutes poke holes in the decal film to release any remaining trapped water bubbles. Brush with Solvaset which will get under the holes you poked and soften the decal film to make the decal really lay down tight. Tamp any silvering areas with a cotton swab when the Solvaset is almost dry but not when it’s wet or you will probably wreck the decal. Before adding an adjacent decal spray with a shot of gloss lacquer to seal the decal and keep it from lifting when you lay the decal next to it.
That’s it. Easy eh? |
|
| Back to top |
|
|
trekriffic
Starship Navigator
Joined: 19 Feb 2015
Posts: 593
|
| Posted: Thu Apr 02, 2020 5:20 pm Post subject: |
|
|
Update...
Finished the trench off with some brushed on Mister Surfacer:

USS Enterprise E - Nemesis-WIP-Backside of Deflector Trench by Steve J, on Flickr

USS Enterprise E - Nemesis-WIP-Finished Deflector Trench by Steve J, on Flickr
Using a pinvise I drilled and filed out these slots in the ventral saucer indent.
This represents the auxiliary deflector array according to an LCARS schematic I found online:

USS Enterprise E - Nemesis-WIP-Aux Deflector Ports by Steve J, on Flickr
You always need to go at these ports from outside and in with this relatively thick plastic.
So cleanup is a big thing when I drill my ports:

USS Enterprise E - Nemesis-WIP- Aux Deflector Ports from Inside by Steve J, on Flickr
I gave the aux deflector array a few coats of thick primer to smooth over any imperfections during drilling and filing:

USS Enterprise E - Nemesis-WIP- Mister Surfacer by Steve J, on Flickr
Not bad.
I'll do a little more work to make the slots more uniform before final hull coats:

USS Enterprise E - Nemesis-WIP- Aux Deflector Array Light Test by Steve J, on Flickr
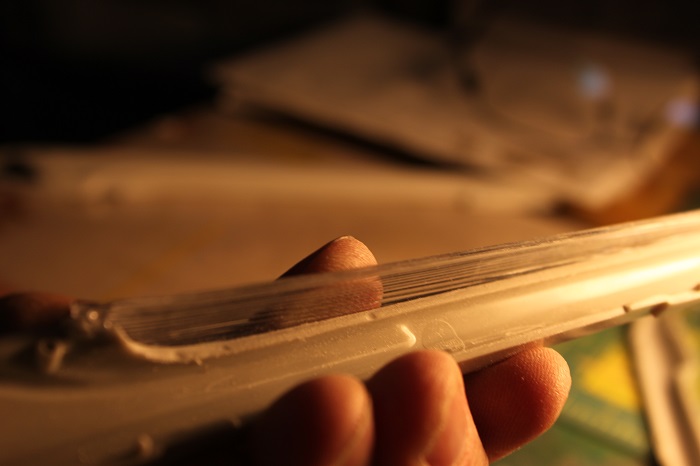
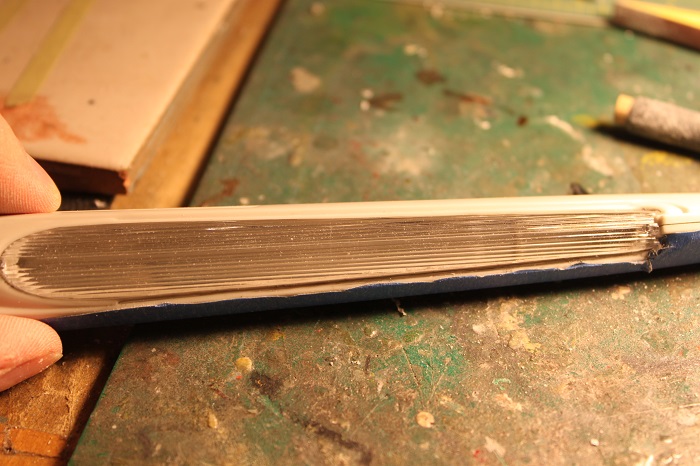
Removed Tamiya tape and sanded clean the upper saucer floodlight shape for the Raytheon Effect:

USS Enterprise E - Nemesis-WIP- Demasking Upper Saucer REffect by Steve J, on Flickr
Once you put a bright cool white LED at the root of the flood inside it will shine thru for a very nice effect from outside I think:
USS Enterprise E - Nemesis-WIP- Floodlight Effect After Demasking by Steve J, on Flickr
Removed mask from inside lower saucer:
 USS Enterprise E - Nemesis-WIP- Demasking Lower Saucer REffect by Steve J, on Flickr USS Enterprise E - Nemesis-WIP- Demasking Lower Saucer REffect by Steve J, on Flickr
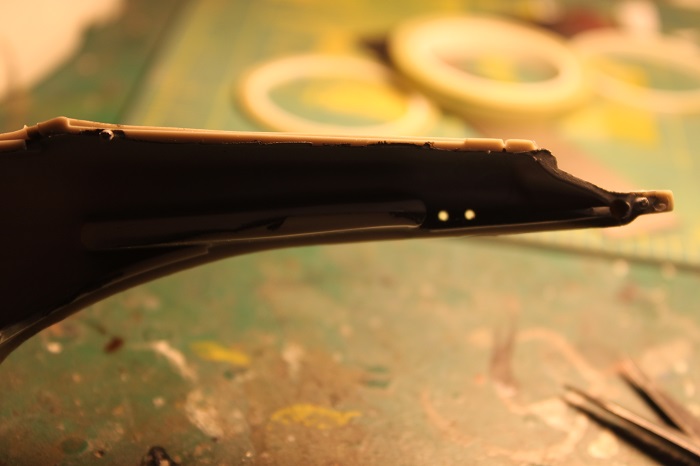
Later on I realized I needed to include the small triangular areas even though they catch less light than the areas I had already made.
You can see where they are missing in this image.
Pie slices.
So I went back and sanded the areas inside the hull to close the arc of illumination from the flood:

USS Enterprise E - Nemesis-WIP- USS Enterprise E - Nemesis-WIP- Floodlight Effect After Demasking by Steve J, on Flickr
After sanding off the trench shoulder triangles to complete the arc of illumination
(the trench on the outside is a hump on the inside) I like the effect much better than before:

USS Enterprise E - Nemesis-WIP- Lower Saucer REffect Test by Steve J, on Flickr
More to come with fun with aluminum tubing and power jacks/plugs.
Also more light blocking and white coats!
Stay tuned my fellow inmates! |
|
| Back to top |
|
|
Gord Green
Galactic Ambassador
Joined: 06 Oct 2014
Posts: 3010
Location: Buffalo, NY
|
| Posted: Thu Apr 02, 2020 5:41 pm Post subject: |
|
|
I continually marvel at your expertise Sir!
Thank you for the tutorial on decals! I'll certainly try them on my next project. You, Sir, are a Master!
_________________
There comes a time, thief, when gold loses its lustre, and the gems cease to sparkle, and the throne room becomes a prison; and all that is left is a father's love for his child. |
|
| Back to top |
|
|
trekriffic
Starship Navigator
Joined: 19 Feb 2015
Posts: 593
|
| Posted: Fri Apr 03, 2020 4:48 pm Post subject: |
|
|
| Gord Green wrote: | I continually marvel at your expertise Sir!
Thank you for the tutorial on decals! I'll certainly try them on my next project. You, Sir, are a Master! |
Thanks a lot Gord! Means a lot to me.
New update...
I'll use an aluminum tube for the display base with a plastic tubing insert (had to modify a larger diameter plastic tube hence the slice and section removed).
It will slide into the aluminum tube almost flush leaving a tiny air gap where the back end of the Size K DC power plug slides down into it.
The styrene tube is glued in with CA to help insulate the metal aluminum tube from the soldered positive and negative leads of the plug.
It's also better to glue the metal power plug into a plastic sleeve to avoid metal to metal contact:
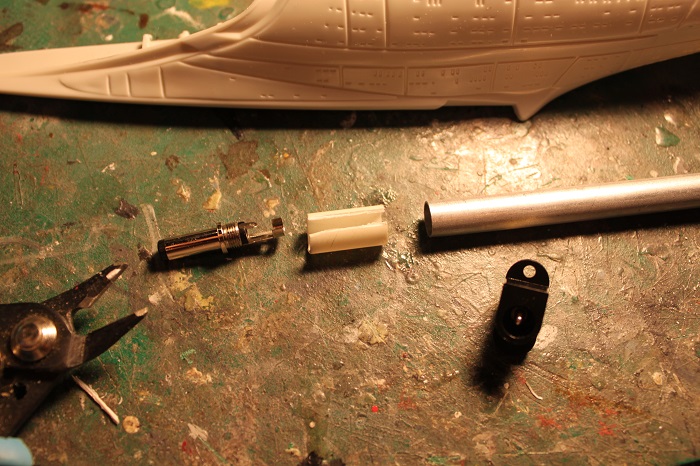
USS Enterprise E - Nemesis-WIP- Display Rod Parts by Steve J, on Flickr
Now that I know it will fit l will shove it down further into the aluminum display tube before gluing with Plastic Surgery glue:

USS Enterprise E - Nemesis-WIP- Insulating Sleeve Fitting by Steve J, on Flickr
Just a test fit with the Size K power plug.
Once the white sleeve is slipped inside and glued into the tube it will make for a very sturdy connection point for the base:

USS Enterprise E - Nemesis-WIP- Power Plug by Steve J, on Flickr
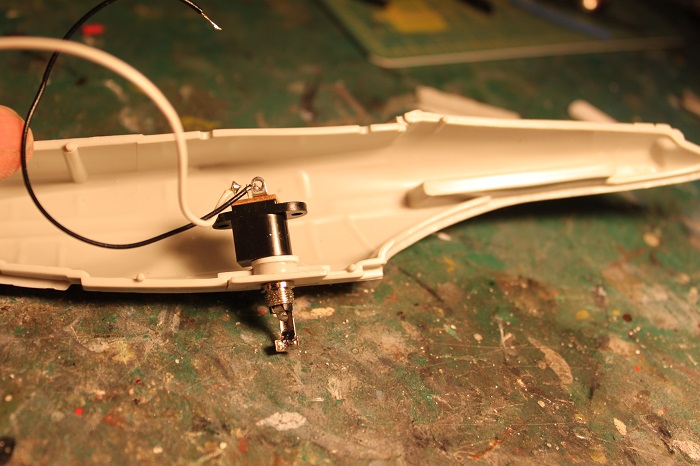
Next I did a little work on the DC power jack inside the secondary hull...
I sliced off the end of the kit provided lower hull stand tube mount to accommodate a size K power jack.
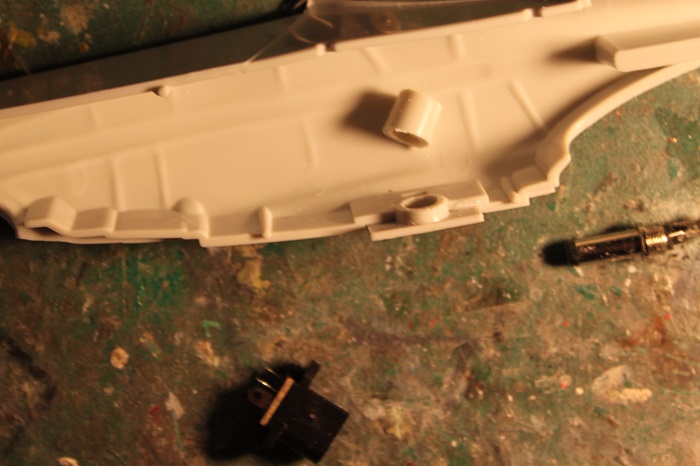
USS Enterprise E - Nemesis-WIP- Internal Mount for Power Jack by Steve J, on Flickr
Test fit slipping the power plug up from underneath into the power jack.
I had to glue on a thin styrene washer to shim it for a snugger fit:
USS Enterprise E - Nemesis-WIP- Test Fit with Power Jack by Steve J, on Flickr
That went pretty well. Next I went back and primed the secondary hull halves:

USS Enterprise E - Nemesis-WIP- Secondary Hull Internal Priming by Steve J, on Flickr
I use these for the light blocking and reflectance layers on the inner surface of the model:

USS Enterprise E - Nemesis-WIP- Primers and Paint by Steve J, on Flickr
Krylon flat white primer layed on directly over the Krylon satin black (black layer not shown here).
Only took a couple of coats:

USS Enterprise E - Nemesis-WIP- Saucer Halves Sprayed White Inside by Steve J, on Flickr
 USS Enterprise E - Nemesis-WIP- Krylon Flat White Primer by Steve J, on Flickr USS Enterprise E - Nemesis-WIP- Krylon Flat White Primer by Steve J, on Flickr
As I started masking the nacelle halves for priming I did a test and realized I would need to remove the plastic on top of the grey nacelle halves for lighting.
Dumb ol' me thought the top of the nacelles were open for lighting already. Doh!
So I cut off the clear nacelle cover part from the clear sprue using a PE razor saw after which I sanded off any remaining sprue stub.
I learned a long time ago not to use sprue cutters on brittle clear plastic parts.
Now I can fit the clear cover in place on the top of nacelle and trace where the outer rim of the clear part is onto the gray plastic using a mechanical pencil.
Then I'll know where to cut:

USS Enterprise E - Nemesis-WIP- Clear Parts Prep by Steve J, on Flickr
The nacelle "cover" or whatever you call it that glows blue is fit to the nacelle.
A nice fit:

USS Enterprise E - Nemesis-WIP- Test Fit Clear Part by Steve J, on Flickr
A soft art pencil followed by a fine tipped mechanical pencil make a tracing around the edge of the clear cover onto the grey nacelle plastic.
Now I know to keep my material removal about 1/32" inside the mark leaving enough for the clear part to glue to:

USS Enterprise E - Nemesis-WIP- Pencil Tracing by Steve J, on Flickr
So next update I will be showing how the nacelles turned out after removing the pencil defined areas using either a hobby saw or most probably my dremel using a grinder bit.
As always, stay safe and happy modeling! |
|
| Back to top |
|
|
trekriffic
Starship Navigator
Joined: 19 Feb 2015
Posts: 593
|
| Posted: Sun Apr 05, 2020 5:22 pm Post subject: |
|
|
New update...
Took about 10 minutes to put things back where they belonged on what had become a cluttered workbench,
an old drafting table.
Then I got out my Dremel with the grinder. It would soon be messy again,
covered by small bits of styrene popcorn peeling off the plastic from the hot grinder bit:

USS Enterprise E - Nemesis-WIP- Bench Decluttering by Steve J, on Flickr
The inner, darker pencil line is as far as I want to go. Just in case the line were to smudge,
I also went around and poked little holes using a pointy dental tool along the pencil line.
I initially thought to drill a hundred holes and cut the piece out with a saw
but opted instead to hog out the tops of the nacelles using the grinder:

USS Enterprise E - Nemesis-WIP- Grinder Guide by Steve J, on Flickr
The line I want to end up with.
I'll grind down close to it but leave enough to easily file and sand to the final contour:

USS Enterprise E - Nemesis-WIP- The Grinder by Steve J, on Flickr
Plastic Popcorn. Not bad grinding IIDSSM.
By the fourth nacelle half I could get one ground down close in under 15 minutes:

USS Enterprise E - Nemesis-WIP- Plastic Popcorn by Steve J, on Flickr
The sanding stick made quick work of the somewhat rougher surface left behind by the grinder.
An exacto knife edge run along the cutout also helped to smoothen it further:

USS Enterprise E - Nemesis-WIP- Sanding Stick by Steve J, on Flickr
These sticks are spring loaded to accommodate different grit sanding belts.
If your belt gets worn out or gunked up just squeeze the stick and rotate the belt to a fresh patch.
Unsqueeze and continue sanding:

USS Enterprise E - Nemesis-WIP- The Detail Sander by Steve J, on Flickr
Looking at the inside of the clear part against the now open nacelle top it appears I got it right.
No gaps from removing too much plastic.
Should glue together well:
USS Enterprise E - Nemesis-WIP- Nacelle Cover Test Fit Inside by Steve J, on Flickr
A nice even edge all around.
The pencil does not steer you wrong:

USS Enterprise E - Nemesis-WIP- USS Enterprise E - Nemesis-WIP- Nacelle Cover Test Fit Outside by Steve J, on Flickr
I am very pleased with how the grinding and sanding went. Only took an hour.
I have a nice smooth edge to glue the clear covers to. Plenty of room now for LED lighting:

USS Enterprise E - Nemesis-WIP- Mating Halves Open by Steve J, on Flickr
This should look great when lit.
I have about three or four different ways I might light the engines.
I have an Acreation deal for the blue lighting effect I'm seriously considering laying on the clear part.
I think it would look great.
Another option is to use the Paragrafix photo-etch warp grills.
I remember them being a pain in the ass to attach on my USS Saratoga.
The PE would require I sand off the molded lines from the clear kit part too. Ugh!:
USS Enterprise E - Nemesis-WIP- Final Test Fit Clear cover by Steve J, on Flickr
More to come with exciting stuff like...
Sorting out the nacelle strut wiring channels!
Stay tuned and stay safe! |
|
| Back to top |
|
|
trekriffic
Starship Navigator
Joined: 19 Feb 2015
Posts: 593
|
| Posted: Mon Apr 06, 2020 10:48 am Post subject: |
|
|
Finished drilling and carving for the nacelle strut wiring...
I drilled these holes from the inside for wires to pass thru up into the nacelle struts:
USS Enterprise E - Nemesis-WIP- Holes for Nacelle Strut Wires by Steve J, on Flickr
The holes match up to channels I carved out of the lower nacelle strut half:

USS Enterprise E - Nemesis-WIP- Holes Outside by Steve J, on Flickr
Using a triangle, a mechanical pencil, a scriber, and my battery powered hobby dremel with a fine grinder
bit I dug out channels in the trailing edge of the two lower nacelle strut halves:
USS Enterprise E - Nemesis-WIP- Making Wiring Channels by Steve J, on Flickr
I initially had planned to put the channels further to the right in this photo where the tab fits into the hull,
you can see how far I got before realizing the plastic was too thin because of the recessed vents (?)
present on the other side of the part.
The plastic was thicker along the training edge and I didn't have to deal with carving and possibly weakening the tab:

USS Enterprise E - Nemesis-WIP- Wiring Slots by Steve J, on Flickr
Back to the nacelles...
Various stages of priming and light blocking the interior nacelle halves and the lower half of each nacelle strut:

USS Enterprise E - Nemesis-WIP- Various Stages by Steve J, on Flickr
Krylon Satin Black is sprayed inside each nacelle half.
Hopefully it doesn't get under the masking tape:

USS Enterprise E - Nemesis-WIP- Nacelle Light Blocking by Steve J, on Flickr
So that brings us up to date on this build. Looking forward to getting my flasher/strobe board from Tenacontrols. Hopefully I'll get it later this week or early next.
In the meantime I can work on the rest of the lights.
Stay safe and try to restrict any "treks" outside. |
|
| Back to top |
|
|
trekriffic
Starship Navigator
Joined: 19 Feb 2015
Posts: 593
|
| Posted: Fri May 15, 2020 12:03 pm Post subject: |
|
|
Sorry for the long delay between posts but I've been spending a lot of time working on the nacelle lighting. I finally got them sorted out though and glued together. Unfortunately, my camera and work laptop aren't communicating. My company has clamped down on any use of the USB port (the one I plug the camera into) for anything other than company approved uses so all of the in-progress photos on my old Canon DLSR are not able to download, possibly until I get a new camera with wi-fi access and/or I get my own laptop.
So I'm relegated to uploading photos taken on my iPad to Flickr! I took this photo this morning though so you guys can see how the lighting effect looks...
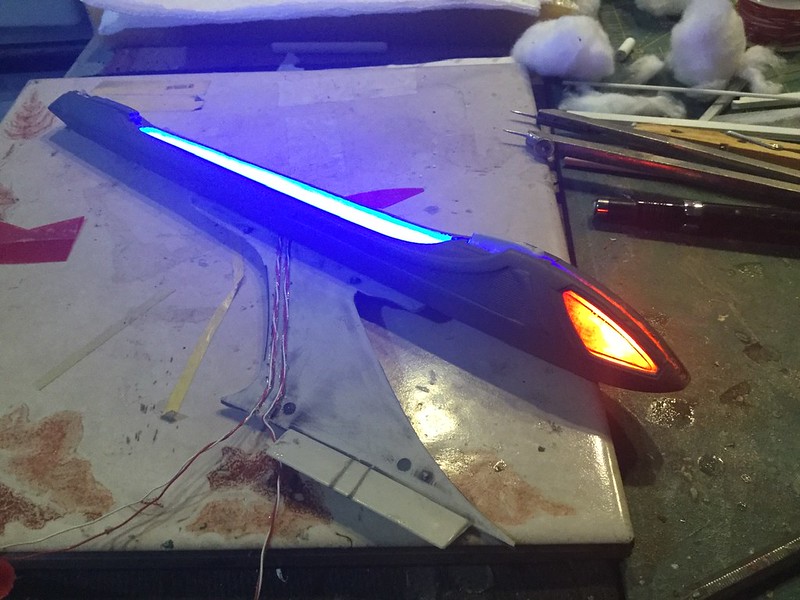
USS Enterprise E - Nemesis-WIP-Nacelle Lit by Steve J, on Flickr
Three amber/red LEDs light the bussards which were painted on the inside with Tamiya transparent red acrylic. I used cotton to act as a diffuser around the LEDs. The top of the nacelles are lit by hi-density blue LED strip beneath a strip of translucent milk jug plastic which acts as a diffuser giving the nacelles a nice even glow. I still have to attach the clear kit part on the top of the nacelles but I may want to attach the photo-etch brass grills first.
The camera washes out the colors to some extent; to the naked eye the colors are more intensely blue and orangish red.
There will be two flashers on the aft end of each nacelle (top and bottom) which will be lit by fiber optic strands fed by a single cool white LED mounted inside. You can see a separate set of wires in the photo, the pair nearest the trailing edge of the pylon. They will flash once I solder the wires to the Tenacontrols flasher board which I will mount in the saucer.
More to come as I start drilling out some, not all, of the windows on the rest of the ship. |
|
| Back to top |
|
|
trekriffic
Starship Navigator
Joined: 19 Feb 2015
Posts: 593
|
| Posted: Sun May 24, 2020 10:04 pm Post subject: |
|
|
Did some work on the quantum torpedo port...
A slot was drilled and filed out previously for the quantum torpedo launch port which is just above the Captain’s yacht in the underside of the saucer. The port will glow blue thanks to a transparent blue styrene part leftover from the 1/350 TOS Enterprise light kit. The part was glued in behind the opening with epoxy. It will be lit with a 2mm LED:

USS Enterprise E - Nemesis-WIP - Quantum Torpedo Port by Steve J, on Flickr
I glued the K size power jack into the secondary hull with epoxy. Later I’ll pack some AVES Apoxy Sculpt in around it for added strength:

USS Enterprise E - Nemesis-WIP - Power Jack Installed by Steve J, on Flickr
The inboard and outboard pylon halves were glued together with Testors tube glue for both pylons:

USS Enterprise E - Nemesis-WIP - Pylon Inboard Half Attached by Steve J, on Flickr
After spraying with adhesion promoter followed by Krylon Grey primer I will attach the upper nacelle grill halves using metal foil adhesive which is basically a tacky white glue. This water based glue will not craze clear plastic parts. I had already painted the raised center strip with Krylon white primer over Krylon flat black for light blocking down the middle of the clear covers:

USS Enterprise E - Nemesis-WIP - Nacelle Grill PE by Steve J, on Flickr
Took about two hours to finish gluing and cleaning up the brass nacelle grills with isopropyl alcohol on a cotton swab. The metal foil adhesive makes a sticky mess and there’s no way to avoid getting it on the painted side of the grills while you work to separate and space the grills while burnishing them down:

USS Enterprise E - Nemesis-WIP - Nacelle Grill PE Installed by Steve J, on Flickr
More to come. Think I’ll work on the impulse engines next. |
|
| Back to top |
|
|
Bud Brewster
Galactic Fleet Admiral (site admin)
Joined: 14 Dec 2013
Posts: 17637
Location: North Carolina
|
| Posted: Mon May 25, 2020 10:09 am Post subject: |
|
|
________________________________
First of all . . . Steve, your amazing! 
I know, I know — we've all said that several times, one way or another, but we certainly haven't gotten tired of saying it . . . and we're pretty sure you haven't gotten tired of hearing it, either.
But your message above made me aware of something new we can praise you for.
Not only do you plan out these great projects in intricate detail, you also execute your plan with the skill and patience of a NASA engineer. Then you carefully document every step with gorgeous photographs!
And THEN you upload the photos to Flicker, compose detailed and fascinating descriptions of the step-by-step process (with flawless photographic illustrations), and combine the two to create these posts on All Sci-Fi.
Okay, everybody know all that. But here's what struck me today.
Steve . . . you also have a JOB! 
What I'm saying is that if we all step back and get the Big Picture of your daily activities, we can't help but wonder if the days are somehow longer where you live, thus providing you with enough to time to do everything I described above . . . plus the fact that you earn a living!
And just to really blow everybody's mind . . . have you folks looked at Steve's thread called The Battle of Sherman's Planet recently? That project is the equivalent of publishing an illustrated version of War and Peace!
Hell's bells, I've spent many happy hours just creating the summaries for that epic story to help us all keep the complex concepts straight in our heads while we enjoy that astounding saga! (Hollywood, eat you heart out!)
Steve . . . come on, admit it! You're actually twins, and you guys partner up on these projects. It's the only possible explanation! 
_________________
____________
Is there no man on Earth who has the wisdom and innocence of a child?
~ The Space Children (1958) |
|
| Back to top |
|
|
trekriffic
Starship Navigator
Joined: 19 Feb 2015
Posts: 593
|
|
| Back to top |
|
|
Bud Brewster
Galactic Fleet Admiral (site admin)
Joined: 14 Dec 2013
Posts: 17637
Location: North Carolina
|
| Posted: Mon May 25, 2020 1:06 pm Post subject: |
|
|
________________________________
Beautiful!
You and your secret twin brother certainly do fine work.
Meanwhile, please let me know what revisions I need to make in the most recent summary for The Battle of Sherman's Planet.
_________________
____________
Is there no man on Earth who has the wisdom and innocence of a child?
~ The Space Children (1958) |
|
| Back to top |
|
|
trekriffic
Starship Navigator
Joined: 19 Feb 2015
Posts: 593
|
| Posted: Tue Jun 02, 2020 2:32 pm Post subject: |
|
|
Update...
I had been debating whether or not to open up the window ports or just rely on gloss white paint to give the illusion of lit windows. Then I thought about how cool those low light shots of the E looked with all those rows of lit up window ports so I finally decided to just go ahead and bite the bullet...
Using a pinvise and a fine pointed round file I commenced drilling out the saucer windows. Some of them will not be drilled out so I can paint them black later on. This took me about 6 hours and I am probably about only half finished with the upper saucer:
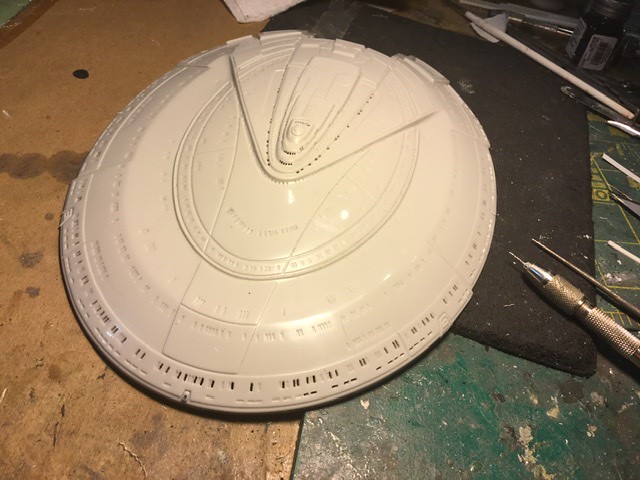
USS Enterprise E - Nemesis-WIP- Drilling Out the Saucer Window Ports by Steve J, on Flickr
The windows show up well when backlit. Still have a few hundred more to drill out:

USS Enterprise E - Nemesis-WIP- Saucer Windows by Steve J, on Flickr
After drilling for What seemed like hours on end I took a break to work on the impulse engines and shuttle control room part...
This is one of the two impulse engine vents. I sanded off the raised detail on the clear kit part and glued the PE grills in place with metal foil adhesive per the PE instructions. Then I used the aftermarket decal, putting it on the inside face of the clear part. It will be lit by a red LED:

USS Enterprise E - Nemesis-WIP- impulse Engine Vent by Steve J, on Flickr
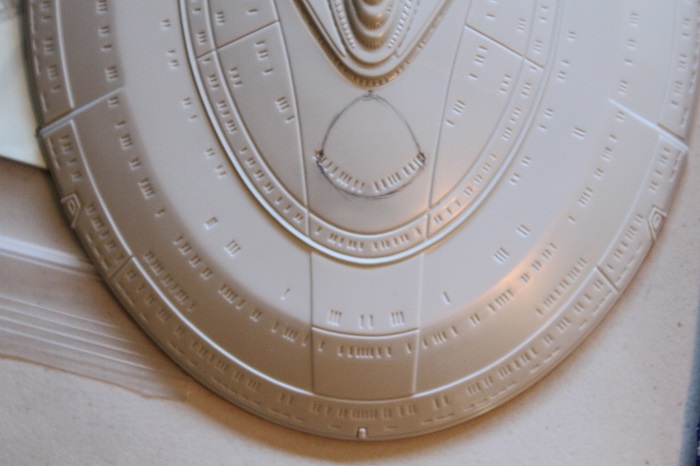
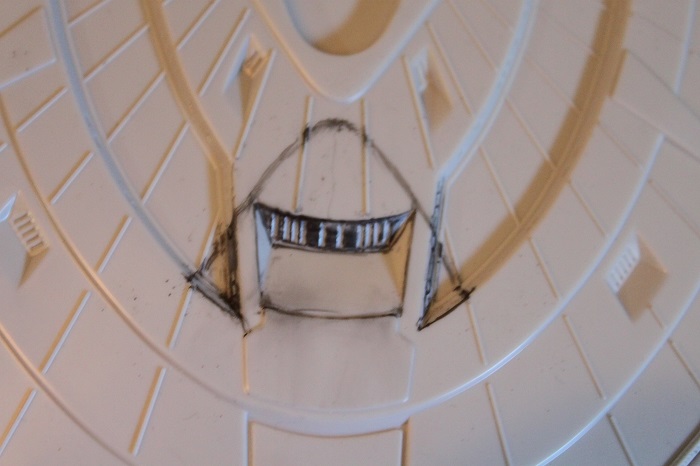
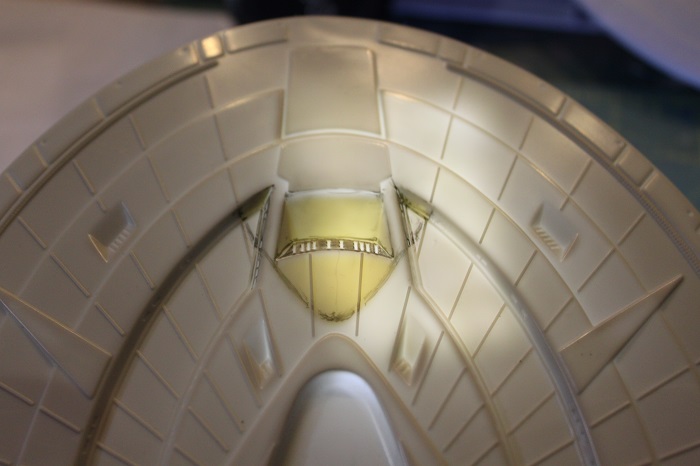
I removed a section of the saucer shuttle bay control room face and glued in a rectangular piece of clear styrene. The PE window frame will be glued on over the clear styrene with metal foil adhesive. Then I will use styrene strip to frame around the PE frame as the windows appear to be recessed from what I see in images of the external bay. The windows will be lit by ambient light inside the saucer:

USS Enterprise E - Nemesis-WIP- Saucer Shuttle Bay Control Room by Steve J, on Flickr
OK... well... back to drilling windows. Hope to be done with them by July.
Steve |
|
| Back to top |
|
|
|
|
You cannot post new topics in this forum
You cannot reply to topics in this forum
You cannot edit your posts in this forum
You cannot delete your posts in this forum
You cannot vote in polls in this forum
|
Powered by phpBB © 2001, 2005 phpBB Group
|


